
Saturday, November 26, 2011
Thursday, November 24, 2011
Happy Thanksgiving!
Hope everyone has a blessed holiday filled with family and friends! I don't have a Thanksgiving card to share with you, but here are a couple more magnetic bookmarkers that express my sentiments to you.


 God is and all is well. Each day of like is a precious gift from God.


Tuesday, November 22, 2011
God Loves Us
Here's another card from my card rack. Didn't even get a chance to stamp last night and tonight won't be much better with the One-Act performance at school. Hope everyone is looking forward to Thanksgiving. I'm excited to do a little traveling to see family and it sounds like the weather will be nice. I'm so thankful for all that God has blessed me with!
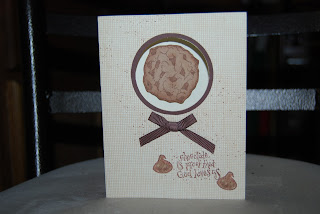
 I'm not even sure where I bought the cookie stamp. I remember ordering it online a long time ago. The front of the card is cut out to show the cookie that is actually on the inside of the card. It might be hard to see this by looking at the pictures.
I put in an Online Extravaganza order last night at 11:30 p.m. I bought the Cookie stamp set so I'll have to share that experience with you when I receive the order and have a chance to make some cookies. I'm excited! Take care and take time for yourself. You deserve it!


I put in an Online Extravaganza order last night at 11:30 p.m. I bought the Cookie stamp set so I'll have to share that experience with you when I receive the order and have a chance to make some cookies. I'm excited! Take care and take time for yourself. You deserve it!
Monday, November 21, 2011
Bargains galore!
Now's the time for Christmas shopping!
Do you have some friends or family members on your Shopping List this year that seem to have everything? Then check out the Online Extravaganza to see the bargain sales!!While on my Stampin' Up website, select Shop Now and on the left side select Online Extravaganza (click on the different '% off' buttons to shop–note that sale prices may not reflect until you click to add an item to your cart):
I'm making my purchases today because I'm getting the Cookie stamp set.
Wow, there are so many things I'd like to have! Here are THREE TIPS to make your ONLINE EXTRAVAGANZA shopping experience a little smoother:
- When you click on a part of the sale (i.e. 50% off items), towards the right of the screen there is a pulldown menu titled “Show:”. By default, the screen shows 8 items. If you select “ALL” then you’ll be able to see all the items in that category at once — much easier to browse

- Remember that the sale prices MAY NOT be reflected until you click to add an item to your cart. Go ahead and add anything you want to check… you can always remove it later. Or not
- Occasionally jot down the product numbers you’re planning to purchase. The cart will not remember your order if you come back to finish shopping later.
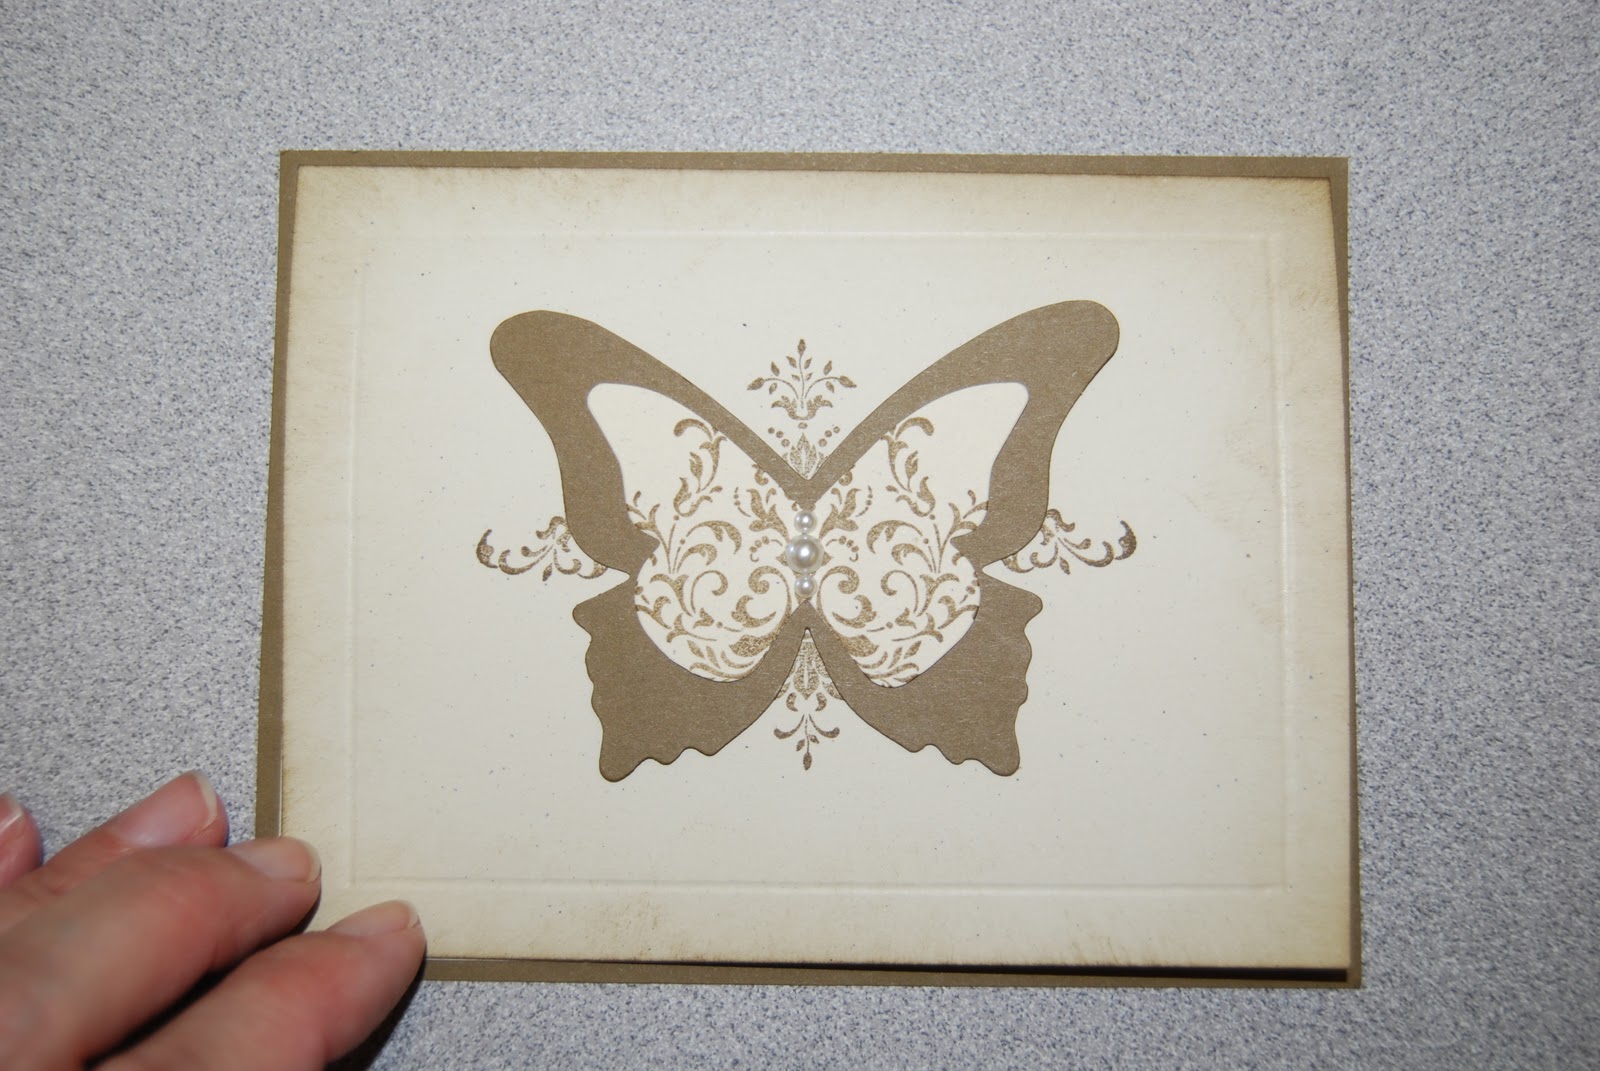
Here's another card from my card rack.

Sunday, November 20, 2011
Busy, busy, busy!
I've been busy working on crafts for the craft show so I decided that I would just take a few pictures of some cards from my card rack. Some of you may not have seen them, but they are old designs so they might look familiar to others. I guess it doesn't hurt to see some oldies again. On this card I used part of last year's DSP of the musical notes. The flower is cut using the Big Shot. It is made up of fabric and cardstock that has been embossed using the lattice embossing folder. This is one of my favorites.


Friday, November 18, 2011
Website to check out!
Hi everyone! It's been a busy week. Paige is now braces free! I also enjoyed a day off from school to take her to Kearney. Yes, we did get to do some shopping. I've been working on mini scrapbooks when I can, but really don't have any pictures right now. I thought I would share this website for today . . . http://mojomonday.blogspot.com/
with you. If I am ever in a bind for a card design or idea, I visit this site and it gets the creativity flowing. I like how over the week more and more entry ideas are added. It isn't just Stampin' Up designs so it is kind of neat to mix and match what I have on hand compared to what some of the examples have. You can check it out, if you would like. I'm looking forward to some crafting time this weekend. Take care!
with you. If I am ever in a bind for a card design or idea, I visit this site and it gets the creativity flowing. I like how over the week more and more entry ideas are added. It isn't just Stampin' Up designs so it is kind of neat to mix and match what I have on hand compared to what some of the examples have. You can check it out, if you would like. I'm looking forward to some crafting time this weekend. Take care!
Tuesday, November 15, 2011
Quick Christmas Card #2
Hi everyone! It was a late night at school last night waiting for Paige with One-Act practice. Today's the day for their first official performance. Anyway, I didn't get home last night until 9:30 p.m. so here is another quick Christmas card I threw together last night.

The DSP is from the Mocha Morning Specialty paper. It has flocked images that feel so fuzzy. The ornament was punched from the silver glitter paper. I used a silver stretchy cording to make it look like the ornament is being hung from the holly leaves. I scored around the card 1/2 inch from all the edges. The "Peace on Earth" and the holly leaves (stamped in Always Artichoke) were from a retired hostess set that at the moment I can't remember the name of. I added gems to the berries on the holly leaves. It looks kind of sharp and doesn't everyone like the glitter and sparkle?

The DSP is from the Mocha Morning Specialty paper. It has flocked images that feel so fuzzy. The ornament was punched from the silver glitter paper. I used a silver stretchy cording to make it look like the ornament is being hung from the holly leaves. I scored around the card 1/2 inch from all the edges. The "Peace on Earth" and the holly leaves (stamped in Always Artichoke) were from a retired hostess set that at the moment I can't remember the name of. I added gems to the berries on the holly leaves. It looks kind of sharp and doesn't everyone like the glitter and sparkle?
Monday, November 14, 2011
Quick Christmas card
I've been so busy with the mini scrapbooks that I knew I had to go make a quick Christmas card. There's still something about making my cards.
 The tree and words are from the Loads of Love stamp set. I wrapped the center white cardstock with the Baker's twine and used the glitter red paper along the sides. The image is added using dimensionals so it stands up from the base card. I ran the base card front through the Big Shot using the square lattice embossing folder. There's nothing wrong with keeping it simple.

Sunday, November 13, 2011
Completed Christmas mini scrapbook
I found some time yesterday to finish up the Christmas mini I had started the day before. I took just a few extra pictures of the embellishments I added.
 I made a pocket on the back of the front cover and inserted a tag. There are lines for journaling on the back of the tag.
 This photo shows a tag that I made with an added paper flower and the saying, "Once in a while, right in the middle of an ordinary life, Love gives us a Fairytale."
 I used the decorative label punch to make the brackets. I used the Big Shot and die to cut the letters out.
 The three butterflies were cut from a die and I added pearl embellishments in the centers.

 The above picture shows the little trinket bears (measure approximately 1 1/2" tall) I have dangling from the ribbon bow on the binding. I thought they looked like a young boy and girl like the newlyweds will be. I also added a couple jingle bells and attached them with little gold safety pins. Some extra lace ribbon was also tied next to the black ribbon bows.
This next picture is the back inside cover.
 Hope you like to see something different, other than cards. I plan to make a couple simple cards and post them soon.


This next picture is the back inside cover.

Saturday, November 12, 2011
Christmas Mini Scrapbook
Here is the start of a Christmas mini scrapbook. I'm planning on finishing this one and giving it to a couple that will be married on November 19th. The title of the album will be "First Christmas as Mr. & Mrs." I've tied the album together using ribbon, but this week I'll try to find some split rings and add those instead. The album is made up of large envelopes and the album's pages measure 4 3/4 x 4 1/8.


 The rest is the fun stuff where I will be adding embellishments and jazzing up the pages and tags.


Friday, November 11, 2011
Mini Scrapbook start
I put together four pages of a paper bag mini scrapbook that I'm starting. I'm not sure why I didn't start a Christmas book, but maybe this weekend. The pages measure 5" x 6". I also want to try an envelope mini scrapbook to see if I like that style better. Here's a picture of the pages so far.
 Each page has a pocket on the front and back, at the bottom of the page so you can stick tags or photos in them. I'm kind of getting hooked on the mini scrapbooking. I still like my digital scrapbooking for bigger pages and making books, but these little books are really cute.
 Have a great weekend! I'm planning on getting some craft items done this weekend in hopes that I'll have something to put on my table at the Chambers Craft Show, Saturday, December 3. Take care.


Thursday, November 10, 2011
Possible Mini Scrapbook Class
No pictures today to show, but I have an idea. I've been doing a lot of searching online at different mini scrapbooks and was wondering if anyone would be interested in getting together in December to make a Christmas mini scrapbook. You would make a mini scrapbook and then take pictures at Christmas time. Then all you need to do is add your pictures to the scrapbook and you'll have a great keepsake. It could possibly be a gift for that someone that has everything. I would charge an amount to attend and everything to make the book would be available in a packet. I have no idea how long a time frame we would need. I'll try to keep track of the time as I make one. I would need to limit the number of people that would attend so I would have time to help everyone and it would have to be by signing up ahead of time. Let me know what you think and if there is any interest. I'll try and make a sample soon so you have some idea of what I'm talking about. If this is something that you think you might be interested in, would you please email me at dexterjane82@gmail.com.
Wednesday, November 9, 2011
Chambers Stamp Club
I thought the Chambers Stamp Club was a success last night. It was nice to see a few new faces and I look forward to seeing everyone else too. Here's the two projects the ladies were able to make. I like to challenge the ladies once-in-a-while. The challenge for the evening was making the paper lace. A couple thought it would have been better to just add lace at the bottom, but I wanted to try making the paper lace. Everyone managed to get their lace made without too much difficulty.


The second project used the stocking die. I kept the stocking gift card holder pretty basic and some of the ladies added some words on the top, white part of the stocking.


The second project used the stocking die. I kept the stocking gift card holder pretty basic and some of the ladies added some words on the top, white part of the stocking.

Monday, November 7, 2011
Burwell Stamp Club
Saturday I went to Burwell's stamping club. It is always great to see everyone and I look forward to making cards that Terri has designed. Here is one of the projects we made. Everyone put their own twist on the card so this is what mine looked like.
 Also, over the weekend, I started making some wedding thank yous I plan to give to a bride and groom as a gift. Here's the start of this project, but will need to finish them up soon.


Chambers stamping club tomorrow so I will need to work tonight to get things ready for that. I'll post tomorrow what we will be making.


Chambers stamping club tomorrow so I will need to work tonight to get things ready for that. I'll post tomorrow what we will be making.
Thursday, November 3, 2011
Stocking die ice skate.


Another stocking gift card holder, only it's an ice skate. What do you think?
Wednesday, November 2, 2011
Tuesday, November 1, 2011


Subscribe to:
Posts (Atom)