
Monday, July 23, 2012
Papillon Potpourri
Can you tell I like this set, Papillon Potpourri, and the coordinating punch (Elegant Butterfly) is so handy. I heat embossed the butterfly using white embossing powder and added rhinestones for the body. The designer series paper is Not Quite Navy paper from the Regals Pattern stack. They are 2 x 2 pieces with the corners rounded. The Little Leaves Sizzlit is cut in Old olive and the words are from the Trust God stamp set. Very basic card that can be made quickly and in large quantities, if needed.


Sunday, July 22, 2012
Papillon Potpourri & Mixed Bunch
Still another hot one out there. I wanted to share the cards that I was able to make at the Burwell Stamp Club on Saturday. It's always such fun getting to see the ladies in Burwell (and Peggy you are not a nut!).
These first two cards were part of the stamp club demos by Terri.

 We also had a shoebox get-together in the afternoon so here are the cards I was able to make that were brought in by some very talented ladies.
Pat's
 Earla's
 Janice's
 Stella's
 Loretta's
 Linda's
 and I need to finish yours Chris. I'm not sure why, but I missed doing the card that Chris brought so I just grabbed the supplies and I'll have to come up with something. Keep stamping ladies because I really enjoy getting to come down to Burwell and getting all of these great ideas.
These first two cards were part of the stamp club demos by Terri.


Pat's


Friday, July 20, 2012
Word Play
I'm enjoying the word stamp set called Word Play that I just got. I know, I had to tear myself away from the Trust God word set. It's a pretty basic card, but one I could throw together pretty quickly. I used versamark ink on the swirls from Everything Eleanor stamp set and a heat embossed, silver butterfly from the Papillon Potpourri stamp set. I used the hearts textured embossing folder for the middle band. Hope you like it!


Thursday, July 19, 2012
Bells & Boughs
Here's my Christmas in July card. Do you think by making a winter card, it will cool things off outside? I doubt it, but it is worth a try.
 The background poinsettias were finished by using Versamark and rubbing red chalk over the flowers and green chalk over the pine needles. The rest is pretty self-explanatory. I do have crystal effects and glitter over the ornament in the word Joy. Have to have a little glitz! If you have any questions, just email me or make a comment.
I'm looking forward to stamping and seeing the group in Burwell on Saturday. Plans are right now that I should be able to make it.

I'm looking forward to stamping and seeing the group in Burwell on Saturday. Plans are right now that I should be able to make it.
Wednesday, July 18, 2012
Catch Up
Hi everyone . . . it's been a whirlwind around here. Leaving the house early to go mow in the hayfield, back in the house to make a quick dinner, and then later during the day back out to rack in the hayfield. No rain in sight so there is no break in sight either.
I have been working on a project every chance I can, but I can't share it with you yet. It's been a fun project so hopefully it will be worth your wait.
I'll try to find some time later today to make a card to share. Stay cool!
I have been working on a project every chance I can, but I can't share it with you yet. It's been a fun project so hopefully it will be worth your wait.
I'll try to find some time later today to make a card to share. Stay cool!
Thursday, July 12, 2012
Viola's Lace
Another quick post and off to the hayfield. We are getting close to being finished. Whew!
 I wanted to try the Viola's lace wheel that I had taken off the wheel once again. Gotta go!

Wednesday, July 11, 2012
Mini Scrapbook
I did manage to finish a mini scrapbook for the bridal shower last Saturday. It turned out to be one of my favorites that I've made lately. I used some rub ons that can still be found in the clearance rack in the Stampin' Up online store. They are called Old Saint Nick rub ons and can be found on page 7. Here are quite a few pictures . . .
 I printed the 'First Christmas as', but was able to use the new Mr. & Mrs. stamp available in the new Stampin' Up catalog.
 I added some jingle bells and a few small ornaments of holly leaves, Christmas ornament, and a red ribbon bow.
 I added crystal effects to the red berries on the stamp from the Bells and Boughs stamp set to give some extra dimension.
 The inside cover was made into a pocket. The rub ons are such an easy way to add to each page.
 Each page has a flap that opens up.
 Here's the same page with the flap opened. I printed the area for the text message. The tag pulls out from the pocket to give more room for added pictures.
 This is the back of page 1. The doily is a pocket that pictures can be placed behind or added to the soft suede cardstock piece that can be taken out and it opens up. A total of five photos could actually be added to this page.
 Here's page 2 with the flap closed.
 Page 2 with the flap opened.
 This is the back of page 2.
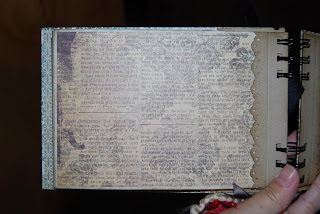 Page 3 with flap closed.
 Page 3 with flap opened.
 Back of page 3.
 This is page 4 with the flap closed.
 Page 4 with the flap opened.
 Here's the inside back cover that also has a pocket like the inside front cover.
 And on the back cover, I added my 'Created by' and signed my name.
 I wasn't able to attend the bridal shower because of haying, so didn't get to see the initial reaction of the bride-to-be. Hope she liked it. Have a great day!


Subscribe to:
Posts (Atom)